

Create and manage custom ticket tags
Managing Custom Tags, custom tags, create tag, delete tag, tag limitAdmins can create, rename and delete custom ticket tags, so agents can label tickets in a way that makes tracking and reporting easier.
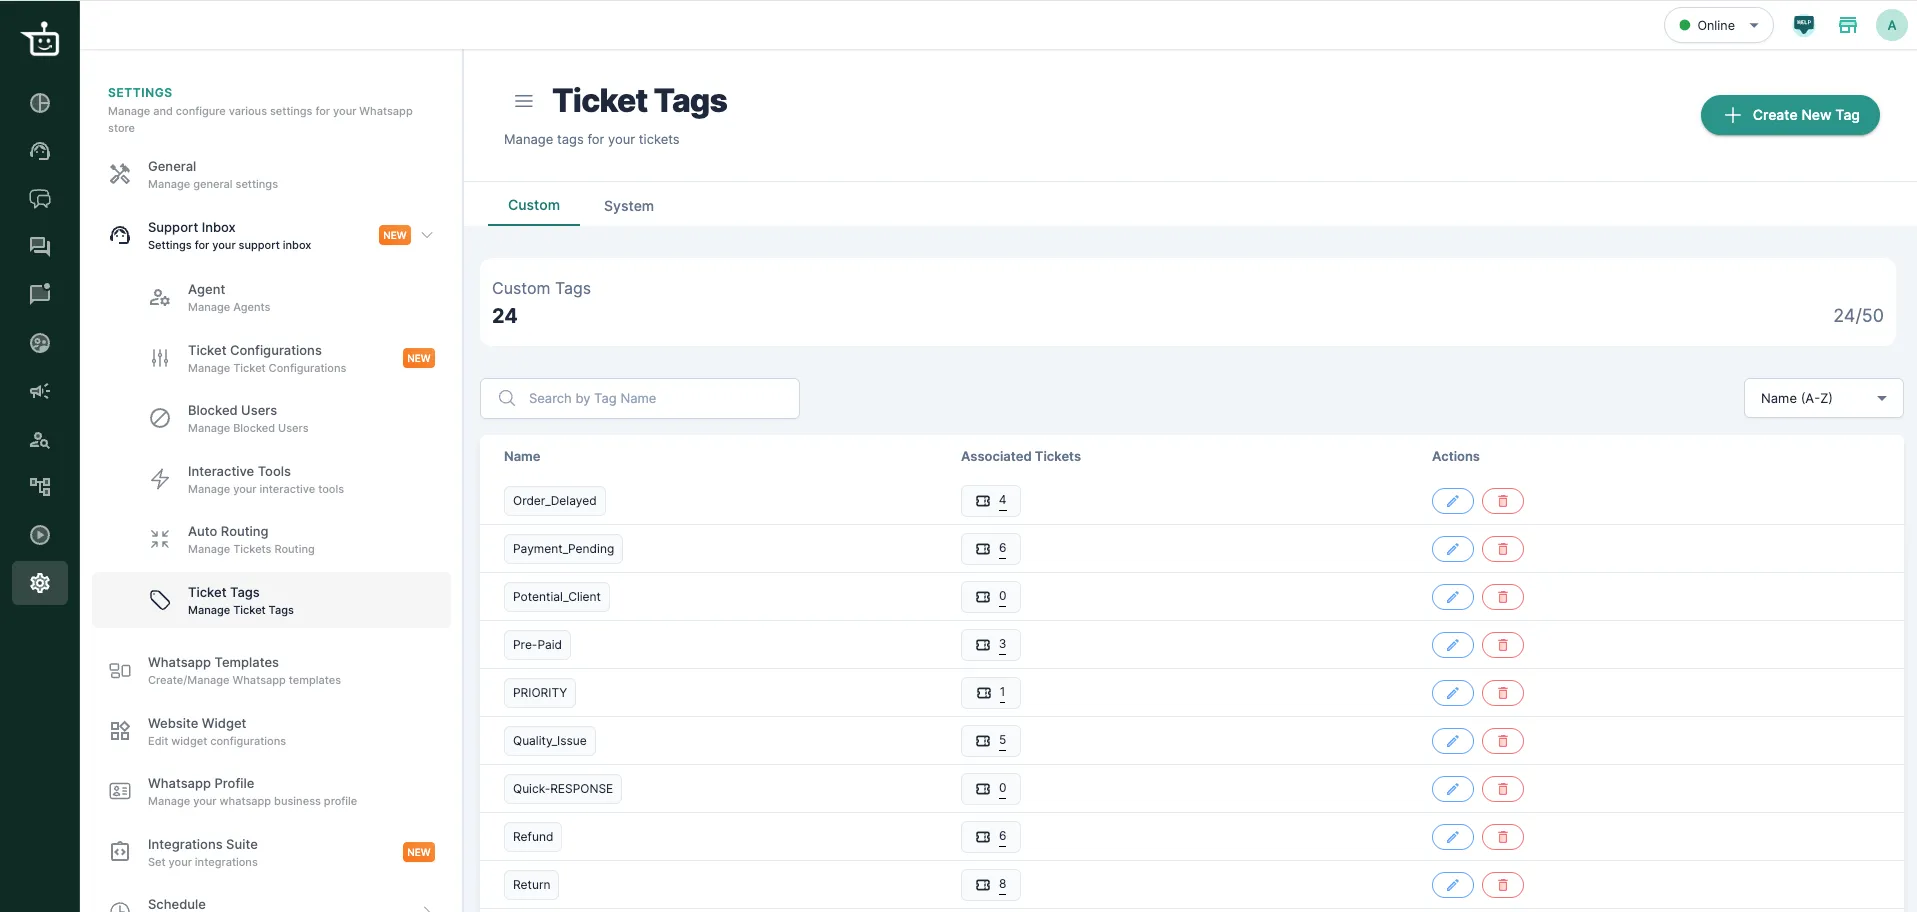
Create a tag
Section titled “Create a tag”-
Go to Settings → Support Inbox → Ticket Tags.
-
Click Create Tag.
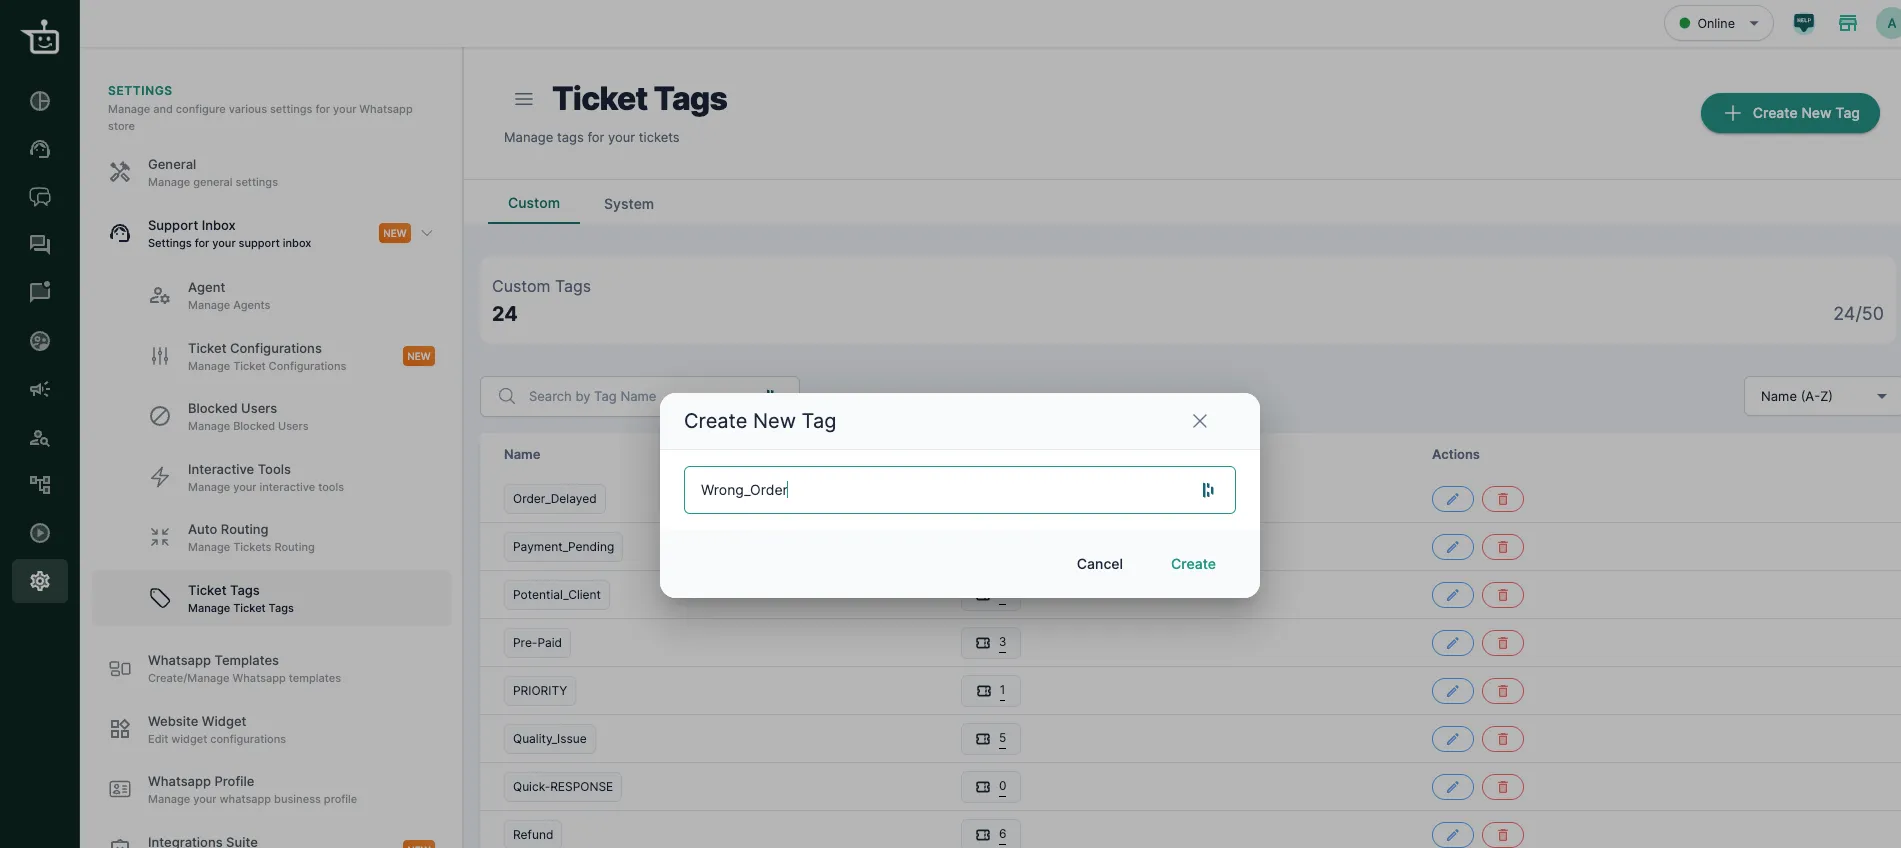
-
Enter a clear name, for example
Billing_IssueorWrong_Order. Follow the naming rules. -
Click Save.
Rename a tag
Section titled “Rename a tag”Find the tag, click the Edit (pencil) icon, change the name and save.

- The new name appears on every ticket that has the tag.
- Analytics and reports keep the tag’s history under the new name.
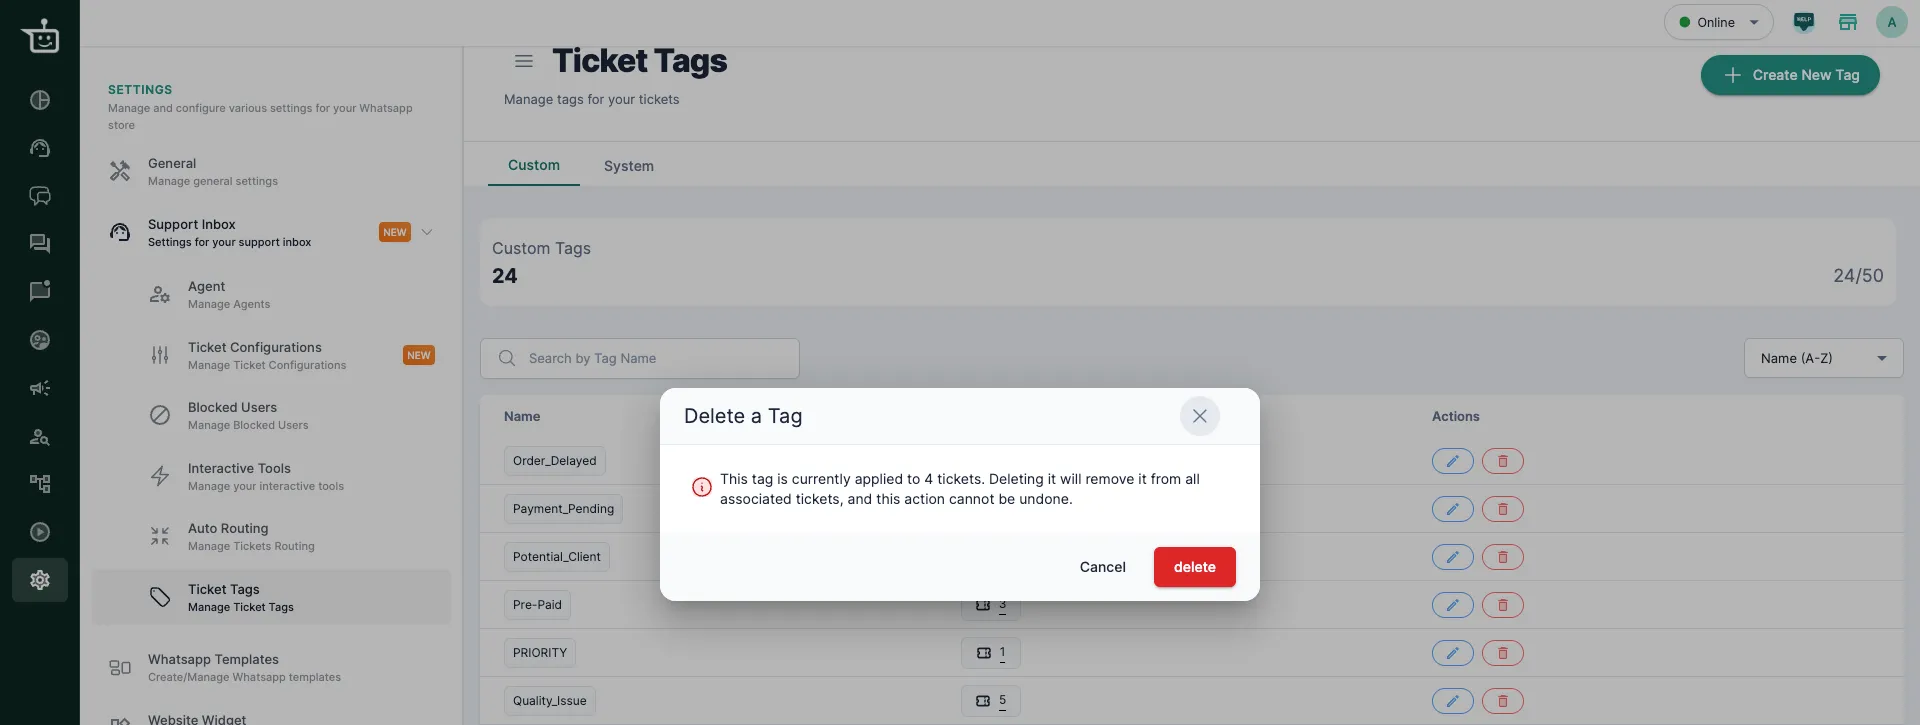
Delete a tag
Section titled “Delete a tag”Click the Delete (trash) icon next to the tag.
Find and sort tags
Section titled “Find and sort tags”-
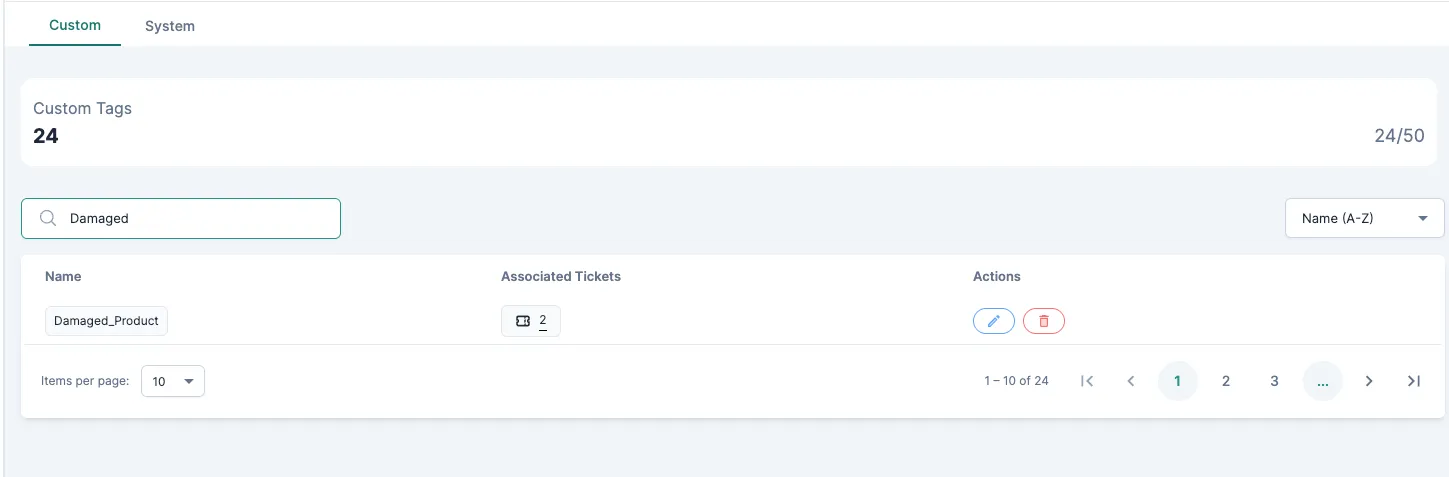
Search: type a tag name in the search bar.
-
Sort: sort by Name (A–Z or Z–A) or by Usage (how many tickets have the tag).

Open the tickets that have a tag
Section titled “Open the tickets that have a tag”Each tag shows how many tickets it is on. Click that number to open a filtered list of those tickets.

Tag naming rules
Section titled “Tag naming rules”| Rule | Details |
|---|---|
| Allowed characters | Letters and numbers (A–Z, 0–9), dashes (-), underscores (_) and colons (:) |
| Not allowed | Other special characters, such as #, @ and ! |
| More than one word | Join the words with an underscore, for example Wrong_Order |
| Length | 32 characters or fewer |
Tag limit
Section titled “Tag limit”- You can have up to 50 custom tags.
- When you reach the limit, delete tags you no longer use before creating new ones.
- To raise the limit, contact BusinessOnBot support.
Review your tags regularly, remove old ones, and use one naming style so you don’t end up with duplicates.
Related
Section titled “Related”Was this page helpful?
Thanks, this helps us improve this page.
Still stuck? Email support@businessonbot.com