

Add agents and manage their status
Manage Agents, add agent, agent password, agent status, status reason, teams, How to configure agents?, How to change username and password of the agent?When you finish, your support team can log in to the Support Inbox, and you can see and control who is available to take new tickets.
Admins, agents and teams
Section titled “Admins, agents and teams”- Admins manage the team: they add users, see details such as usernames and creation dates, and update them when needed.
- Agents are your frontline support team. They get tickets and reply to customers.
- Teams, such as a tech team or a sales team, let you send tickets to a group with the right skills instead of to one person.
Add an agent
Section titled “Add an agent”Admins add agents from the dashboard by creating a username and password for them.
-
Go to Settings → Support Inbox and open Agents.
-
Choose Agent as the user type.
-
Click Add Agent.
-
Enter a username and a password for the agent and save. The username doesn’t have to be a real email address. It is only used to log in to BusinessOnBot, so a pattern like
name@yourbrand.comworks. -
Share the username and password with the agent.
Agents can also use the BusinessOnBot mobile app.
Change an admin’s or agent’s password
Section titled “Change an admin’s or agent’s password”-
Go to Settings and open Manage agents.
-
Find the user whose password you want to change and click Edit next to their profile.
-
Select Change Password, enter the new password and save.
Set agent statuses
Section titled “Set agent statuses”An agent’s status shows whether they are available. Only agents who are online get new tickets through Auto Routing.
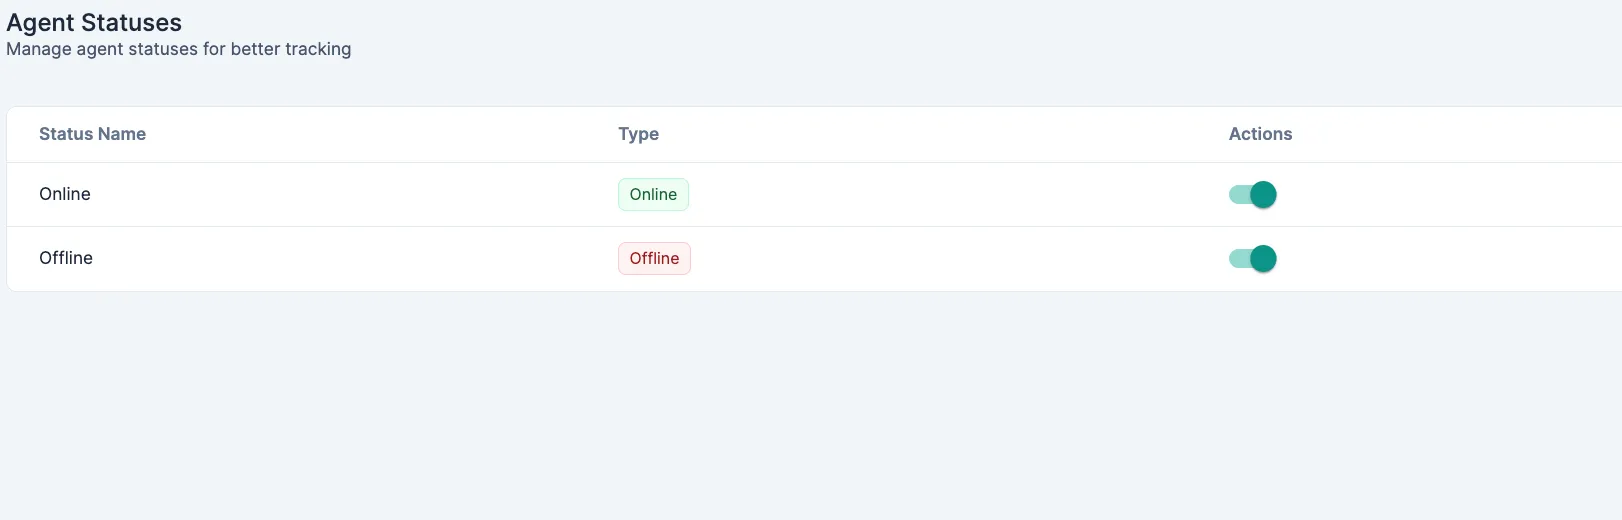
There are two statuses by default:
- Online: the agent is available to take tickets.
- Offline: the agent is unavailable, and no tickets are routed to them.
Use the toggles in the Actions column to turn a status on or off.
Agents change their own status from the top right of the Support Inbox.
Add a status reason
Section titled “Add a status reason”A status reason tells the team why someone is away, for example “Lunch break” or “In a meeting”.
-
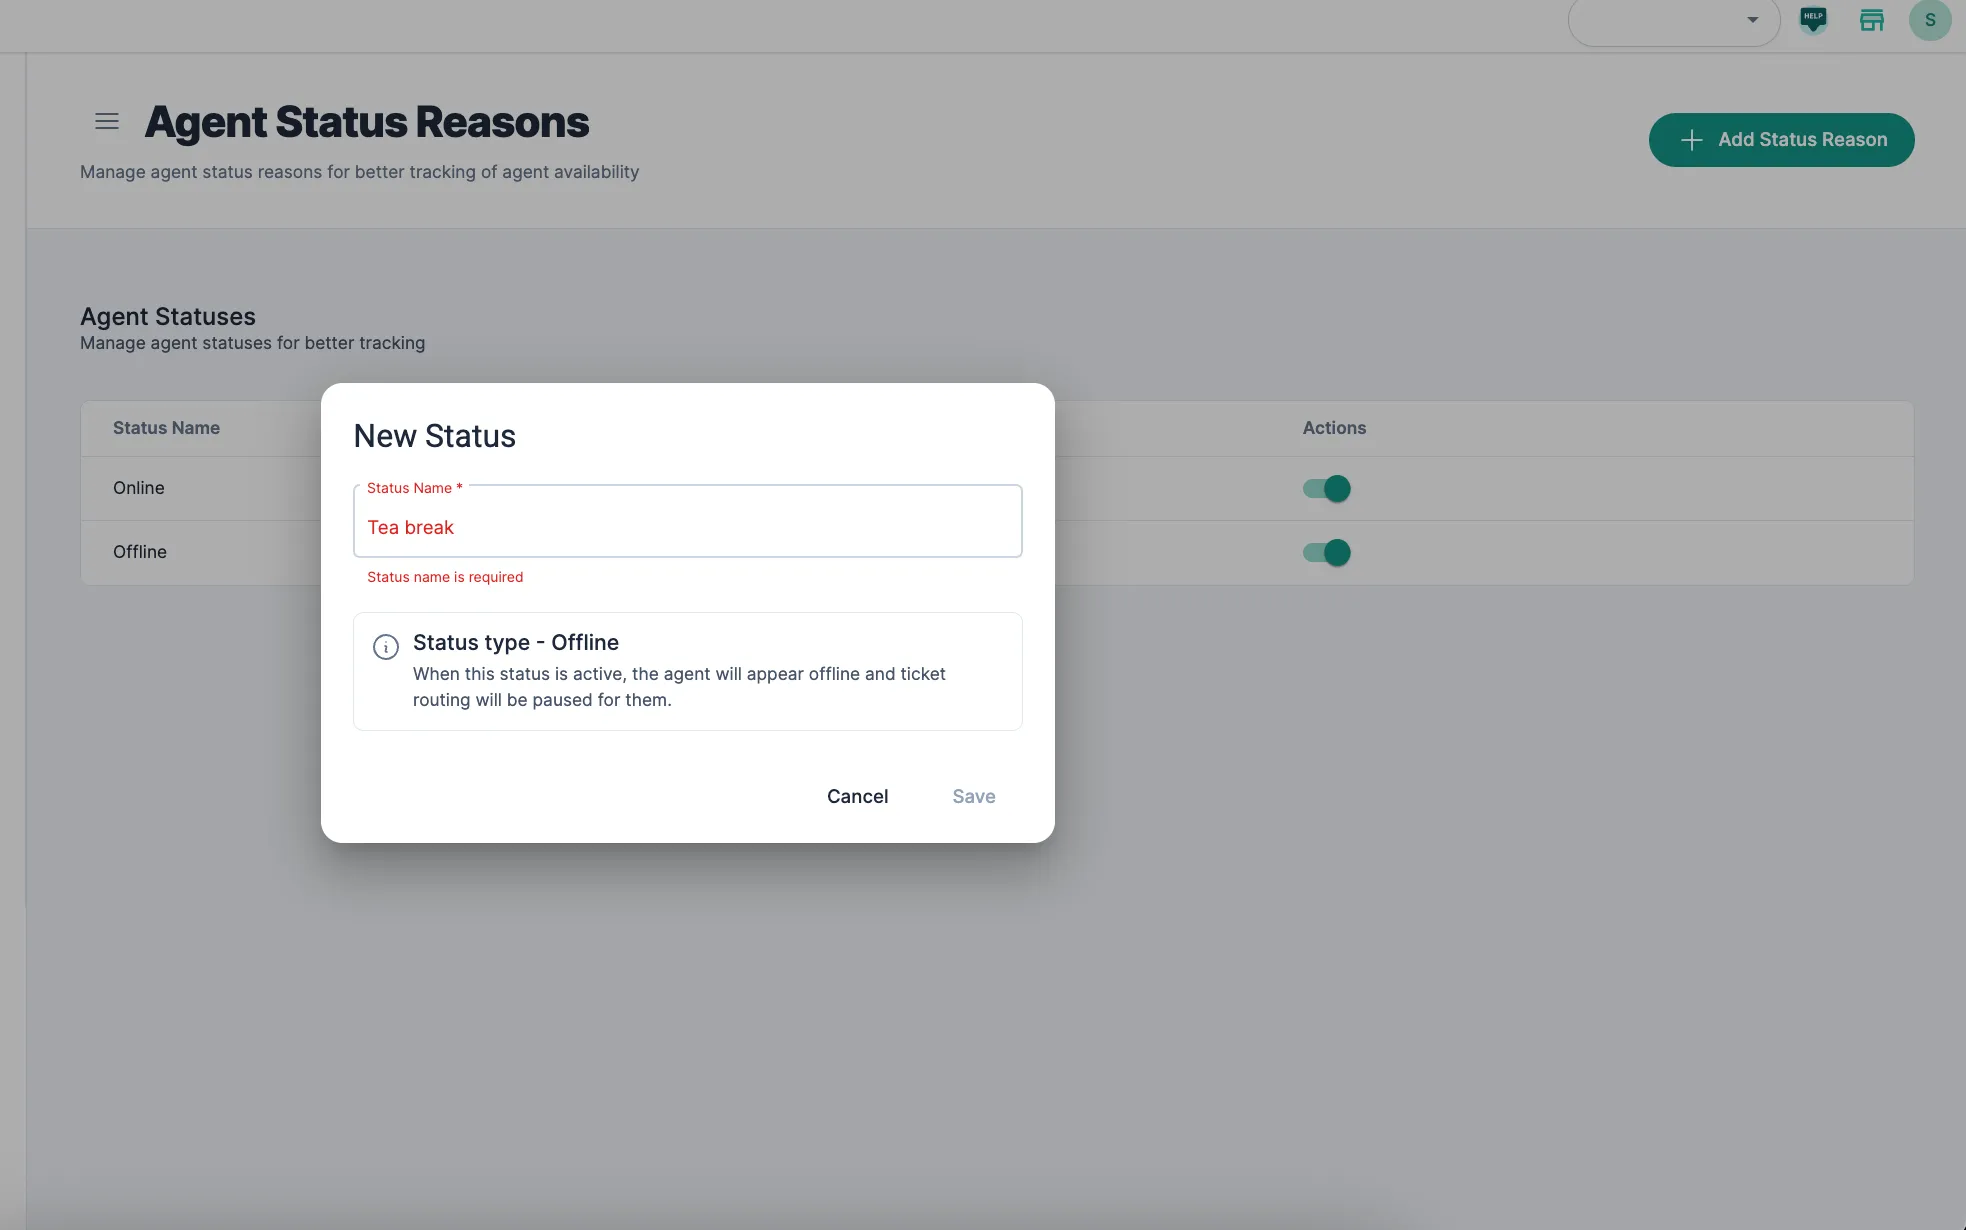
Click + Add Status Reason.
-
In Status Name, type the name, for example “Tea break”.
-
Check Status Type. An Offline status means agents who choose it show as offline, and tickets stop being routed to them.
-
Click Save.
Interactive walkthroughs
Section titled “Interactive walkthroughs”Related
Section titled “Related”Was this page helpful?
Thanks, this helps us improve this page.
Still stuck? Email support@businessonbot.com