

Team members and roles
roles, permissions, team, users, admin, add user, RBAC, Roles & Permissions, custom roleAn admin adds team members from the dashboard by creating a username and password for each person. To add agents, see Add agents and manage their status.
Then use Settings → Roles & Permissions to control what each person can do in the Support Inbox.
Go to Settings → Roles & Permissions → Roles. Every account starts with two system roles:
| Role | Description |
|---|---|
| admin | Administrator with full access |
| agent | Individual agent with full access to tickets |
You can view system roles but not change them. To give someone narrower access, create your own role.
Create a custom role
Section titled “Create a custom role”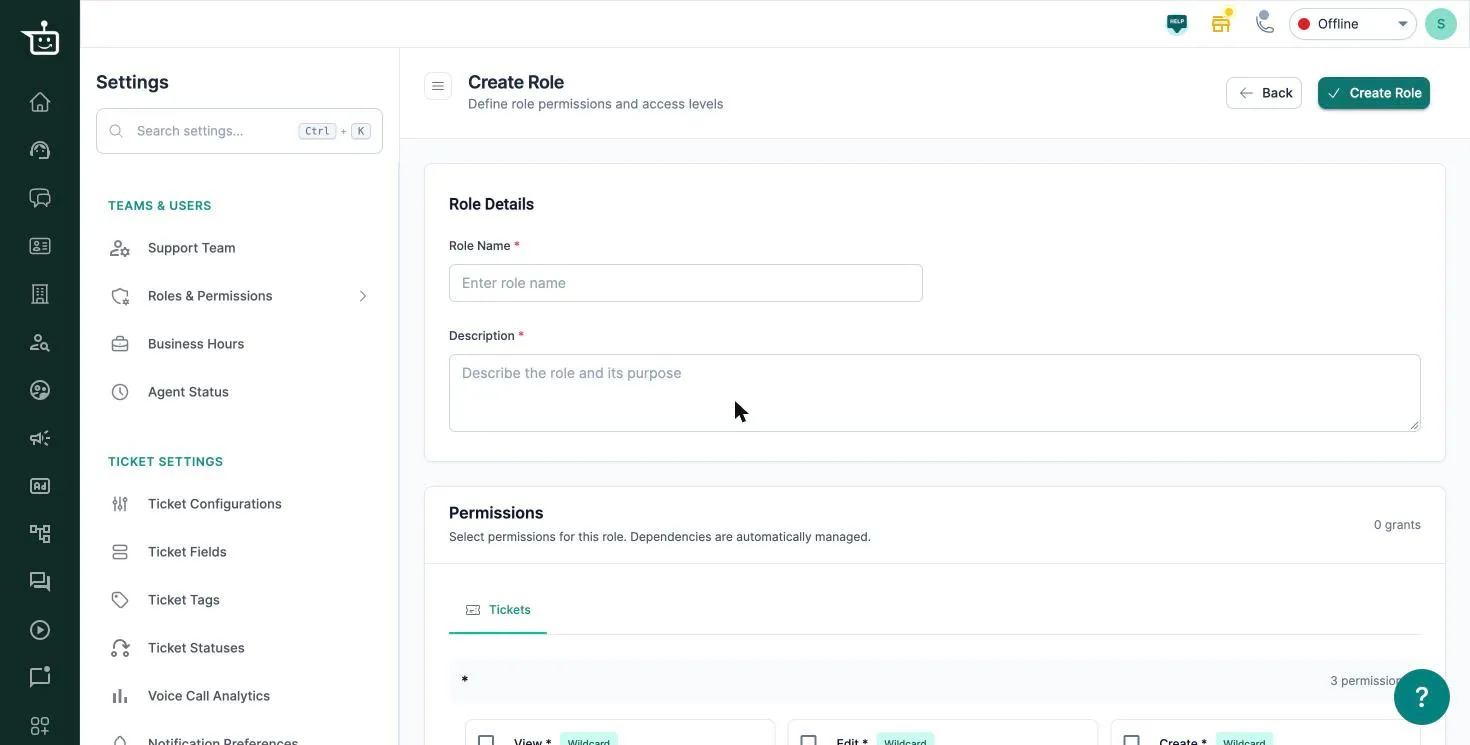
- Go to Settings → Roles & Permissions → Roles.
- Click Add role.
- Enter a Role Name and a Description.
- Under Permissions → Tickets, tick what this role can do.
- Click Create Role.
Permissions depend on each other. For example, Edit Status on Tickets needs View Status on Tickets, so ticking an edit permission also ticks the matching view permission.
| Group | What you can allow |
|---|---|
| Tickets | View, edit and create tickets, or all ticket permissions at once |
| Assign | See who a ticket is assigned to, and change the assignee |
| Composer | See the reply box and send messages. Without view access, the reply box is hidden |
| Status | See and change a ticket’s status |
| Tags | See tags, and add or remove tags on tickets |
Give a team member a role
Section titled “Give a team member a role”- Go to Settings → Roles & Permissions → Permissions. You’ll see each agent with their role.
- Click Edit next to the person.
- Click Add role and pick the role.
On the same screen you can choose which tickets the person sees:
- Only the tickets assigned to them.
- Tickets assigned to them and to their support teams or groups.
- All tickets.
Use Add to group to put the person in a support team.
Related
Section titled “Related”Was this page helpful?
Thanks, this helps us improve this page.
Still stuck? Email support@businessonbot.com